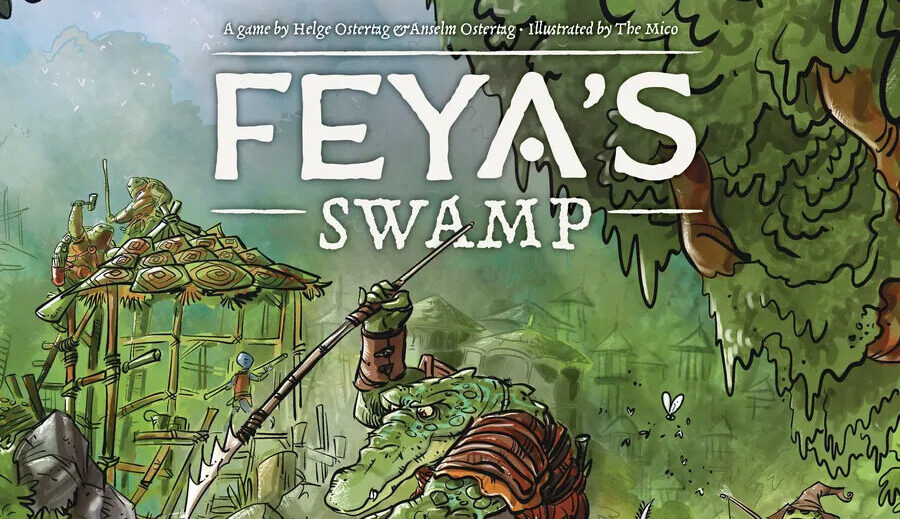
Feya’s Swamp
Every review on Meeple Minded is written after exactly one play. No replays, no second sessions — just an honest account of how a game landed the first time we sat down with it.
The reason is simple: there are too many games to play. New releases come thick and fast, and the pile of unplayed games on the shelf never gets any shorter. In that reality, most games only get one shot at the table. If a game takes two, three, or four plays to reveal its strengths, it may well be a great game — but if that first play didn’t grab us, the chances of it making it back to the table are slim. We don’t need to love a game immediately, but if it’s the kind of game that needs multiple plays to click, we need to be able to see that potential in the first session. We’d rather not invest three or four plays only to find it wasn’t for us after all.
There are plenty of reviewers who play games many times before passing judgement, and if you want a deeper, more considered take on a game’s long-term merits, they will serve you far better than we will. But that’s not what this is. This is one play, one verdict — an honest reflection of how many people actually experience a game. Our conclusion isn’t whether a game is objectively great or not. It’s simpler than that: would I play it a second time?
One 4P game played
Intro
Feya’s Swamp casts players as rival amphibian clans — Crocodiles, Turtles, Frogs, and Salamanders — settling a mystical wetland over four rounds, fishing its waters, trading with rivals, and paying tribute to the gods through festivals. Underneath the theme sits a boat-driven worker placement Euro: each round players place workers on boat or ground actions to fish, trade, build settlements, or advance their sailing capability, all while managing gold, mana gems, and a rotating cast of Guide cards. Each Guide card sets that round’s turn order via a fixed initiative value, alongside a settlement cost, a sailing range, and a unique power — so drafting a new Guide each round is as much about securing a favourable turn position as it is about the ability attached to it. Scoring is modular too, drawn from a hand of randomly dealt Score cards each game, which means the paths to victory can shift from one playthrough to the next.
Four players took around three hours including the teach, a reasonable length for a game with this many moving parts, and one that should shrink meaningfully once the systems are internalised.
Setup & Teach
Physical setup was straightforward despite the sheer number of components on display with clan boards, the swamp board, building tiles, temple stacks, guide and race cards all having their place. The teach itself was serviceable rather than crisp: several of the interlocking systems — the fish/trade/build loop, how Celebrate scoring actually resolves, the role of Spirit tiles and the Island Totem — landed better in the doing than in the explaining. That’s a common enough trait in games of this density, where a certain amount of “you’ll see once we’re playing” is almost unavoidable.
Gameplay
The engine at the heart of Feya’s Swamp settles into a clear rhythm early: fish to stock your settlements, trade those fish for gold, build with that gold, and repeat. With three or more actions available most rounds — more once temporary workers and bonus tokens enter the mix — build actions came up almost every round, threaded between fishing and trading runs that kept the resource pipeline moving.
The Guide card draft sits above all of this as the round’s framing decision, with each card fixing an initiative value that determines turn order for the round, a sailing range that dictates how far your boats can travel to fish, trade, build, or reach the temples at the swamp’s edge, and a settlement value that sets your build costs for every tile you construct that round. Taking a card is therefore never a single choice — going early in turn order for first pick of contested spaces might mean accepting a shorter sailing range or a steeper settlement cost, while a card built for cheap, efficient building might leave you moving last and picking through what’s left on the board. In this game its influence on strategy was present but not overwhelming; it shaped the margins more than it dictated the plan, though the trade-off between position, mobility, and cost was consistently felt.
Settlement building itself splits across four separate tracks on the clan board, and each pursues a distinct part of the economy. One track builds out fishing capacity and boat presence — its tiles increase how many fish each boat collects on a Fish action and can grant additional boats onto the board outright, feeding directly into the fish-trade loop. A second track is tied to sailing progress, advancing your position on the Sailing Track and banking immediate victory points each time a tile on it unlocks, which compounds into greater movement range for every boat action going forward. A third track feeds gold and mana gem income, paying out resources during the Income Phase once a settlement on it is built — the track that keeps the economy liquid enough to keep affording new settlements elsewhere. The fourth expands your worker pool, unlocking additional workers you can place in future rounds, which is really a bet on tempo: more workers means more actions per round for the rest of the game. Choosing which track to build becomes part of your strategy for the game since each track’s unlocked bonuses compound differently depending on what kind of economy you’re trying to run. It would appear that the strongest positions tend to come from leaning into one or two tracks rather than spreading evenly across all four.
The individual actions break down as follows:
- Fish — move available boats onto spaces showing the current round’s active fish colour and collect fish pieces into your reserve. Only certain fish types are catchable each round, so successful fishing depends on positioning your boats close to where the useful fish will be, not just where they are now.
- Trade — move boats next to settlement tiles and place fish onto them; placing on an opponent’s settlement pays gold based on stack position, placing on your own banks fish for later Celebrate points.
- Build Settlement — move boats to a free space adjacent to an island and construct a settlement tile from one of the four tracks on your clan board, paying gold based on spirit spaces present and your Guide card’s settlement value.
- Sail — move boats freely without triggering another action; the only way to reach temple spaces at the swamp’s edges and claim temple tiles.
- Improve Sailing — advance your sailing track marker, permanently boosting movement range and banking immediate victory points for the move.
- Celebrate — throw a festival on a chosen island, scoring points for every fish-topped settlement on it (with a bonus if the Island Totem sits there) and awarding every player points for their own fish on that island’s tiles.
- Add Spirit Worship — place a new Spirit tile and relocate the Island Totem, reshaping which island benefits from future celebrations.
- Pass — opt out for the remainder of the round in exchange for a Round Bonus tile and a fresh Guide card for the next round.
Building, despite looking like the most intimidating action on paper — juggling settlement costs, Spirit spaces and Guide-card modifiers — turned out to be far more manageable in practice than the rulebook’s presentation suggested. The Spirit tiles and Island Totem, by contrast, are easy to underrate early and grow considerably more relevant as the game progresses. Once settlements begin filling the islands, placing a Spirit tile is no longer simply about moving the Totem for a future Celebrate action: one of the main end-game scoring elements multiplies the number of settlements on an island by its Spirit spaces. That turns Spirit placement into a potentially major scoring lever, and one we only really appreciated once the board had developed. It’s worth noting that Spirit tile placement isn’t only available through the Add Spirit Worship action — the last player to pass each round also places one, which makes the order in which players choose to pass a quiet strategic lever in itself. It is definitely an area I would focus on much earlier in a second play.
Celebrate is where the game’s tension concentrates. Timing a festival well — catching an island with settlements freshly stacked with fish, ideally the one holding the Island Totem — is clearly one of the sharper decisions in the game. The problem is in the resolution. Tallying fish across tiles and colours is fiddly, and because every player scores their own fish on the chosen island, the player spending the action can end up enabling almost as many points for opponents as they score themselves. There is real strategy in deciding when and where to Celebrate, but the payoff for actually committing an action to it can feel strangely diluted.
Interaction is more present than the parallel-engine structure might suggest. Boat blocking to force opponents into longer, costlier routes was a real feature of the game, while contested settlement spots and temple access added positional friction on top of the economic engine. The Spirit tiles should add another layer to that interaction in future games: once everyone understands how heavily they can influence end-game island scoring, placing one is likely to become as much about making it more expensive for other players to build on specific islands as improving your own scoring position.
What gradually emerges is that most of these systems sit around the same central economic loop. Fishing provides the stock, trading turns that stock into gold, and gold funds the settlements that improve your economy and create the board position from which the larger scoring opportunities emerge. Guide cards, boat positioning, Spirit placement and Celebrate timing all bend that loop in different directions, but after one play the question is whether they eventually create genuinely different strategic routes or mainly offer different ways to optimise the same fish-trade-build cycle. There was enough happening around that core to make the answer uncertain rather than obvious, which is exactly why a second play is interesting.
Final scoring adds another layer rather than simply totting up what’s already visible: islands score based on settlement count multiplied by Spirit spaces present, while a randomly dealt pair of Score cards rewards different settlement patterns each game — largest island, smallest island, temple proximity, single-settlement islands — and leftover fish, mana gems, and gold all convert to points as well. That randomised Score card pairing does real work in keeping the endgame maths from feeling identical game to game, even if the moment-to-moment loop stays fairly fixed. Turns moved at a good clip throughout, and three hours for a first play across four players felt reasonable.
Likes
- The Fishing action’s rotating seasonal availability forces genuine long-term boat positioning from the opening turns, even in a first play — a rare case of a game teaching forward planning through its own mechanics rather than through experience.
- Build looks complicated on the page but resolves cleanly at the table once the pieces click.
- The Spirit tiles are a slow burn that pays off — understated early, increasingly central as the game develops.
- Pacing held up well across the whole session; despite the density of systems, the game kept moving.Text here
Dislikes
- The Island Totems feel underpowered relative to the attention it demands — some form of end-game scoring tied to them, perhaps via set collection, feels like a missing piece.
- The core loop of fish, trade, build settles into a repetitive rhythm round after round.
- Celebrate is fiddly to calculate, and the player spending the action can end up enabling almost as many points for opponents as they score themselves.Text here
Verdict
Feya’s Swamp is an interaction-rich mid-weight Euro with some clever twists around otherwise familiar mechanisms. Seasonal fishing makes boat positioning matter several turns ahead, the Guide cards force useful compromises between initiative, movement and building cost, and the Spirit system became considerably more interesting once its importance to final scoring became clear. There is plenty here that works. The concern is the rhythm underneath it all. Fish, trade and build formed such a consistent cycle across the four rounds that the surrounding systems sometimes felt as though they were modifying the same plan rather than opening genuinely different ones. The variable Score cards, Guide combinations and a better understanding of Spirit placement could change that considerably on a second play, and there was enough evidence of that possibility to make another game worthwhile. I would play Feya’s Swamp again. I am not yet convinced the fish-trade-build loop has enough variety for the game to earn a long-term place on the shelf, but I came away wanting to test it rather than feeling I had already seen everything it had to offer.